
Support & FAQs
How to embed Javascript slideshow to website
Most of Photo Slideshow Maker users create flash slideshows for their own websites. Photo Slideshow Maker enables you to create flash slideshows under two types of technology: creating object embed tag or javascript SWF object. This page is about creating object embed tag. Go to the tutorial of How to embed object tag slideshow to website page?

Two ways to embed PFM-created flash slideshows to websites: professionally, or in a easy way.
Professional Way to Embed Javascript Slideshow to Website
To incorporate the PFM-created flash slideshows created into an existing webpage, you can manually adding the <OBJECT> and <EMBED> tags to the page. You can also download or watch online video tutorial on how to embed slideshow.
Step 1. View Flash Slide Show and copy the code on the page.
After you click Publish Now! button, wait for the slideshow to create, and after you see the pop up box, click View Flash Slide Show button.There will be a prompt web page that contains the slideshow. Copy the code which is under the slideshow.

Open your existing HTML web page with a HTML editor like Dreamweaver, paste the code tags into the desired location in the body of the page. The code can also be pasted into a table cell or frame.
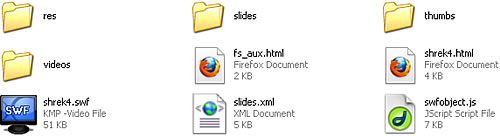
Step 2. Open Output Folder and copy all PFM-created files to the same folder with existing HTML web page.
There should be 9 files in the output folder if you chose advanced templates. Copy all of them and paste into the same folder with your HTML web page.
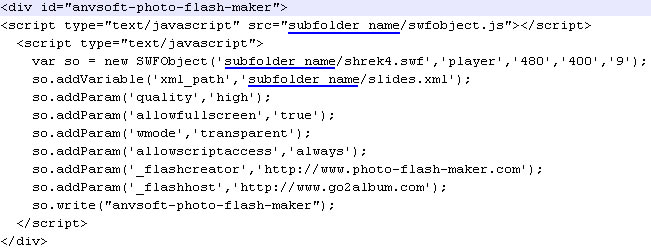
In this way, you don't need to do any changes to the code. If you put these PFM-created files in a subfolder or sub-subfolder under the folder which contains your HTML web page, you may have to change the paths of the slideshow in the code. Add the subfolder name in the paths of three files: swfobject.js, *.swf and slides.xml files. The javascript code is like:
Step 3. Upload the HTML webpage and javascript flash files to your Web server.
You should upload all PFM-created files together with your HTML webpage to your web server. Done.
Easy Way to Embed Javascript Slideshow to Website
If you don't want to upload slideshow files to Web server, or have difficult in handling the file path, you can simply upload the javascript slideshow to our free web album service Go2Album, and then get the HTML code to embed to your webpage.
Step 1: Sign up for Go2Album
Go to www.go2album.com and sign up for the free service.
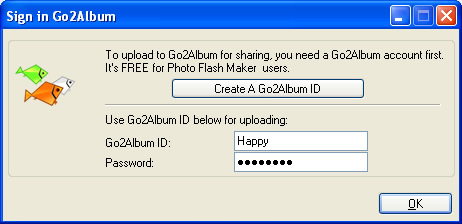
Step 2: Sign into Go2Album
Open the Photo Slideshow Maker program, click the menu "Preference", and click the "Sign in Go2Album" item, enter your user name and password, click "OK" to save the setting.
Step 3: Upload javascript slideshow to Go2Album
When you proceed to the last step of creating slideshow with Photo Slideshow Maker, select the option "Create Flash File and Upload to Go2Album", and the Flash slideshow will be automatically uploaded to Go2Album.
The program will prompt you to the webpage where the javascript slideshow displays.
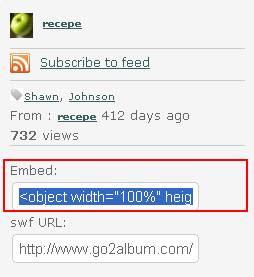
Step 4: Copy the HTML Code of the Javascript Slideshow
On the right sidebar of the Go2Album web page, you will see the embed code. Select and copy the HTML code.
Step 5: Embed HTML code to designated webpage
Now you get the source code. Just open the webpage, and paste the code to where you want to display the Flash slideshow. Done.
![]() Download FREE trial of Photo Slideshow Maker to make flash slideshow
Download FREE trial of Photo Slideshow Maker to make flash slideshow
![]() Buy Photo Slideshow Maker to make flash slideshow without limitations
Buy Photo Slideshow Maker to make flash slideshow without limitations